
Edit online
Make it in your browser, free
Type your text, download the video. No app needed.
On this page · 6 sections
To add a map pin or location title to a travel vlog, make a short animated overlay with the place name and put it above the first shot of each new place. The quickest way is a template you edit in the browser: on Edit online, open Map Pin Location or Travel Location Lower Third, type the place, pick your colors and download a transparent video for Premiere Pro, DaVinci Resolve, Final Cut Pro, CapCut or any other editor. This guide shows which style to use, how to add it and how to keep a series of locations consistent.
Why travel vlogs use location titles
- Orientation. Viewers know where they are the moment the scene changes.
- Structure. A new place, day or stop feels like a new chapter.
- Search and memory. People remember and search for places they saw named on screen.
- A produced look. A small animation does more for the feel of a vlog than most color grades.
Which template for which shot
| Moment | Try |
|---|---|
| Arriving in a new city, especially in vertical videos | Map Pin Location |
| A place name over a walking or drone shot | Travel Location Lower Third |
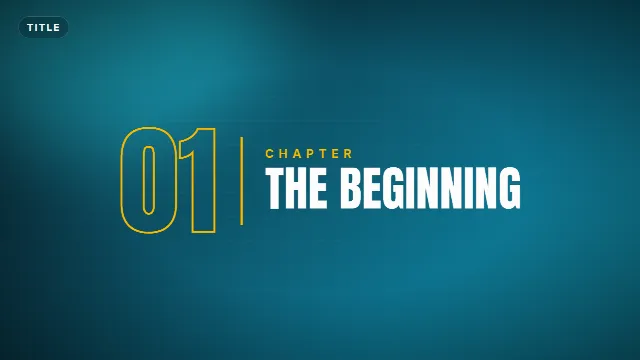
| Day 1, Day 2 or a new part of the trip | Chapter Title |
| A calm, cinematic opening shot | Cinematic Blur Title |
| Weddings, honeymoons and slow travel films | Elegant Serif Title |
| Fun, casual vlogs and road trips | Handwritten Marker Title |
Map Pin Location
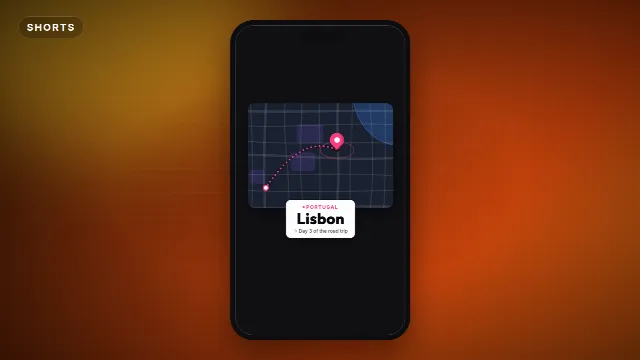
A small map card appears, a dashed route draws across the streets from a start dot, a pin drops with a ripple and a white card pops up with the place name. You fill in three lines: the place (for example "Lisbon"), the country or region and a small line such as "Day 3 of the road trip". You also pick the accent color for the pin and route, the background color of the map, a font and the speed. It is seven seconds long and comes in vertical, square and landscape.
To be clear about what it is: the map is stylized, not real. The streets, water and parks are generated from the place name, so "Lisbon" always gives the same map, but it is not a map of Lisbon. It works as a graphic that says "we arrived here". If you want to show the real route you drove or flew on an actual map, use a dedicated map animation tool for that part and use these templates for the place names.
Travel Location Lower Third
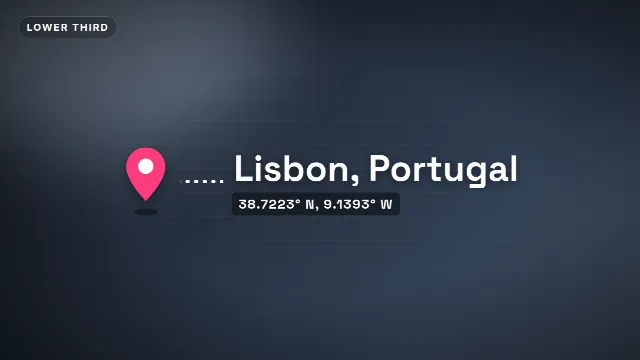
A pin drops in with a ripple, a dotted line draws to your place name and a detail line types out under it. The detail line holds coordinates by default, but you can type a date, a country or a day number instead. You can put it on the left, in the center or on the right, which helps when the subject of your shot is on one side. It is six seconds long and works in all three sizes.
Travel templates on Velosofy

Make it with your own place
- Open the template on Edit online.
- Type the place name. Use the local spelling or the one your viewers know, and keep it short.
- Fill in the second line: a country, region, date or day number.
- Pick an accent color. Warm colors like orange, pink or yellow stand out against sky, sea and stone. Avoid green, the green screen version is keyed on green.
- Choose a font and the speed. Slower speeds suit calm travel films, faster speeds suit energetic vlogs.
- Choose the size: 16:9 for YouTube, 9:16 for Reels, TikTok and Shorts.
- Create the video. It renders in about a minute. Download the zip with a free account.
The zip has a transparent -alpha.mov, a -greenscreen.mp4 and the sound effects (a pin
drop, a pop and a whoosh) in the video and as a separate WAV. Keep them for a playful vlog, or mute them under music.
Add it in your editor
Premiere Pro, DaVinci Resolve, Final Cut Pro
- Import the
-alpha.mov. - Place it on a track above the first shot of the new place.
- Start it a moment after the cut, once the viewer has seen the place, not on the exact frame of the cut.
More on alpha files and fixing black backgrounds in how to use transparent video overlays.
CapCut and other phone editors
- Add the
-greenscreen.mp4as an overlay and stretch it to fill the frame. - Remove the green with Chroma key and raise the intensity until the green is gone.
- Move it to the start of the new location.
Green edges? See how to use green screen overlays in CapCut.
Tips for travel vlogs
- One style per trip. Use the same template, colors and font for every place in a video, and change only the text.
- Combine big and small. A Chapter Title for each day, and a location lower third for each stop within the day.
- Use calm shots. Put the overlay on a wide or slow shot. On shaky handheld footage it is harder to read.
- Keep space for it. On a landscape shot, place a lower third on the side with sky or empty space.
- Mind the safe zone in vertical videos. The bottom and right side are covered by app buttons and captions. More in text overlays for TikTok, Reels and Shorts.
- Do not label everything. A new city, a new day or a special spot deserves a title. A coffee stop usually does not.
Checklist
- Short place name, second line with country, date or day
- Same template, colors and font across the trip
- Starts just after the cut to the new place
- Right size for the platform, inside the safe zone
- No green in the colors
More for your travel videos: text and title templates, lower thirds, transitions and travel templates.
Frequently asked questions
Edit online
Make your location pin
Free with a free account, in 16:9, 9:16 or 1:1.
Type the place, pick a color, download a transparent map pin animation.
Open Map Pin Location