
Edit online
Make it in your browser, free
Type your text, download the video. No app needed.


On this page · 8 sections
A transparent video overlay is an animation without a background: a title, lower third or subscribe button that you place on top of your footage, and everything around it is see-through. On a computer, the best format for this is a .mov file with an alpha channel. This guide explains what that is, how to use it in Premiere Pro, DaVinci Resolve and Final Cut Pro, and how to fix the usual problems.
What makes a video transparent
Normal video stores three channels per pixel: red, green and blue. A transparent video adds a fourth, the alpha channel, which says how see-through each pixel is. Most delivery formats, like the MP4 files you upload to YouTube, have no alpha channel at all. That is why an overlay saved as MP4 always has a solid background.
Overlays with alpha usually come in one of these formats:
| Format | Good for |
|---|---|
| ProRes 4444 .mov | Premiere Pro, DaVinci Resolve, Final Cut Pro, After Effects |
| WebM (VP9 with alpha) | Browsers and OBS Studio |
| PNG sequence | Compositing apps, but a folder of thousands of images is clumsy |
| Green screen MP4 | Phone apps without alpha support, removed with a chroma key |
Why ProRes 4444
- It carries alpha. The "4444" means full color detail plus a full alpha channel.
- Every major editor reads it. Premiere Pro, DaVinci Resolve, Final Cut Pro and After Effects on both Mac and Windows.
- Clean edges. Soft shadows, glows and anti-aliased text keep their partial transparency, something a chroma key cannot do perfectly.
- Smooth editing. It is light to decode, so scrubbing through the timeline stays responsive.
The free Originals on Edit online download as a zip with a ProRes 4444
-alpha.mov, a -greenscreen.mp4 for phone apps, and a README. You set the text, colors,
font, position and speed in the browser, see the result in a live preview, and the video renders in under a minute.
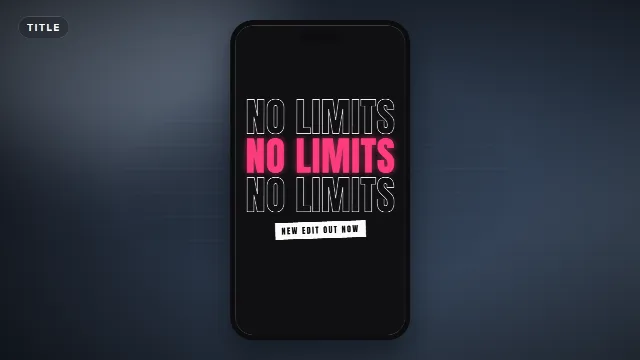
Titles you can drop on any video



Premiere Pro
- Import the
-alpha.mov(File → Import, or drag it into the Project panel). - Drag it onto V2 or higher, above the clip it should cover.
- Your footage shows through around the animation. No effect or key is needed.
If the overlay is a different size than your sequence, right click it and choose Set to Frame Size. Want to keep the transparency when you export the overlay again? Export as QuickTime with the Apple ProRes 4444 preset and an alpha channel, not as H.264.
DaVinci Resolve
- Import the .mov into the Media Pool.
- Place it on Video 2 above your footage on the Edit page.
- Resolve normally detects the alpha channel. If you see black around the animation, right click the clip in the Media Pool, choose Clip Attributes and set Alpha mode to Straight. If the edges then look too dark or too bright, try Premultiplied.
Final Cut Pro
- Import the .mov into your library.
- Drag it above the primary storyline, so it becomes a connected clip.
- ProRes is Apple's own codec, so the transparency works without any extra step.
After Effects
Import the .mov and drop it into your composition above the other layers. If After Effects asks how to interpret the alpha, choose Straight, which is how ProRes 4444 stores it. You can change this later in Interpret Footage.
Common problems
Black background instead of transparency
- Wrong file: you imported the MP4. Use the
-alpha.mov. - Wrong track: the overlay is on the bottom track, so there is nothing below it to show through. Move it above your footage.
- Alpha ignored: check the clip's alpha setting (Clip Attributes in Resolve, Interpret Footage in After Effects).
- Converted on the way: some tools and cloud drives re-encode video. Use the file straight from the zip.
Dark or light fringes around edges
The alpha is being read as straight when it is premultiplied, or the other way around. Switch the alpha mode and compare.
The file is huge
That is normal for ProRes 4444. It stores every frame with almost no compression, which is what keeps edges clean. The size only matters while you edit: your exported video is compressed as usual. If disk space is tight, delete the .mov after the project is finished and keep the zip or the template link so you can render it again.
Playback stutters
Lower the playback resolution in your editor, or keep the project and the overlay on a fast drive. Exported video is not affected.
No transparency on a phone
Use the green screen version instead, see how to use green screen overlays in CapCut.
What to use transparent overlays for
- Name bars in interviews and podcasts, see how to make a lower third.
- Subscribe reminders, see how to add a subscribe button.
- Titles and chapter cards, see animated text titles for YouTube.
- Transitions like the Circle Zoom Transition or Glitch Slices Transition, placed over the cut between two clips.
Browse templates for Premiere Pro, DaVinci Resolve and Final Cut Pro, or all transitions.
Frequently asked questions
Edit online
Transparent overlays with your own text
Free with a free account, in 16:9, 9:16 or 1:1.
Customize free Originals online and download a ProRes 4444 .mov with alpha.
Edit online for free